How to get started with Hugo and GitHub
- hugo tech guides blogs
I am no expert
I should start this by saying I started this website a good year ago and did nothing with it. I was adamant that I would do everything in wrought HTML ,lets just say that was a massive mistake. I ended up settling on a simple home page with a hugo blog to power the back-end. After multiple hiccups with finding a theme i had settled on Tokiwa for a while and all was well… that was until i tried blogging. It just would not work for me. This is not to say that its a bad theme, It was great and it would probably have worked if I had deployed it to a server but that’s neither here nor there. I ended up settling on Ink by knadth. It was much more simple to set up and (in my opinion) much easier on the eyes. I am now writing this to help people not fall into the same pitholes I did.
Prerequisites
you will need …
- git or a git client (I use ma-git but i will use the command-line for this tutorial)
- a github / gitlab account and a repository
- the hugo program (refer to the official documentation for the install)
- a hugo theme (you can find them here)
- a text editor that can edit toml and markdown files (I use Emacs but whatever was bundled with your system will work)
- some patients
Getting started.
- start by making a repository for your website. title it yourusername.github.io. This will be the repo that will hold all of your posts and your theme. I won’t go into detail on how to make a repository but you will find details here
You need to consider
- To make your repository public as you will not get the github page add-on
- you need Initialise with A README. We will then clone the repository and work on it
- We will now clone the repository using
git clone https://github.com/*yourusername*/*yourusername*.github.io
cd *yourusername*.github.io
if you have hugo installed you should now run (if you don’t you should really install it now)
hugo new site *your blog name*
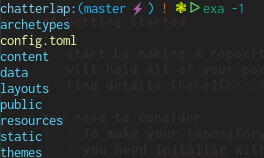
this will create a bunch of directories and a “config.toml” file. We will be using this file now.

Configuration
We will now be editing our config.toml to take our theme. when you open it in in your config.toml it will look something like this
Not to fear! all we need to do is add some declarations and all will be ok! first lets add our base url
baseurl = "https://yoururl.org"
this can also be set to a sub folder of your website using
baseurl = "https://yoururl.org/blog"
just note that if you follow this guide to the letter, in this case your links to files (such as images or any static asset) will need to start with your sub folder
eg
where as a normal scenario would be

This is all dependant on your use case and it will all be explained as we go further.
lets now set some more variables.
languageCode = "en-gb" # sets the language for your site
title = "My New Hugo Site" # your site title
these are quite self explanatory but are still required
the theme var is important. this will dictate how your entire website will look. If you have chosen a theme then all you need to do is put your theme as is in the theme folder. this should look like this
./themes/yourtheme/*files*
you can then set your chosen theme by using its directory name
theme = "yourtheme"
This is where you have to part ways as every theme handles its interface
differently. all themes on the hugo website will have
an example site which you can use as a base. If you use the Ink theme you can
pretty much rip my
config
inserting your own details. We also need to set up a content file structure.
This again vary on theme but should be a little more streamline. here’s mine.

Again this will all depend on your theme so the example site is your friend!
Now you have your thing all set up you now need to push it to your site! If you are using github pages you need to link the public folder a sub folder of your site you can do this by using the command
ln -s path/to/public path/to/the/subfolder
This would look something like this (all of this took place in the root of the project)
ln -s blog-hugo/public blog/
remember to build your site
hugo -v
you need to do this every time you make a change or add a post
now you can push all of your files!
if you have never used git that’s fine Ill give you all the commands
Using Git
Now you have written it all out you now need to push it to your site!
first you need to add all of your files to the git tree
git add .
the dot represents all the files in your folder that have not been added.
now that we have added them we need to commit the files. (you can always revert a commit so don’t worry if you need to roll back)
git commit -a -m "Inital commit"
the -a flag tells git to commit all files. the -m flag is the commit message
flag. this is where you will title your commit. This is nothing special just
keep it simple and relevant
Now you can run
git push
after this, if all goes well your site will be built and you will be go to it! If it does not you can do some trouble shooting steps
Troubleshooting
- if you cloned your theme delete the .git folder and rebuild. This sometimes confuses the build system
- If your site does build but no posts show up. try copying the example site file structure and see if your post shows up then
- If it does not work. Try switching themes.
Writing a post
You will need to know a litle markdown. its really not that hard and a little practice will go a long way. here is a great cheatsheet
While you are writing you can get a preview using the
hugo server
If you use the -D flag it will also render drafts
once you have started the server you can access it by going to localhost:1313
in your web browser
Adding posts
If you want to add another post you need to add a yourpost.md file to the content file structure you have set up. When you have written it you need to do a similar process to your first git commit.
There will be a build
hugo -v
an add
git add .
and a commit
git commit -a -m "your commit message"
Do this every time you write a file or change a post.
Finishing up
This covers the basics of git hugo and markdown. I hope this guide was helpful and gets you started on writing your own blog If this post was helpful and you liked It share this guide around or shoot me an email!